How to Read a Power Window Wiring Diagram
A power window that only works from one switch, moves in one direction, or blows a fuse the moment you hit the button usually has one thing in common – you need the circuit, not a guess. This is where the right wiring diagram saves time. It shows you what is powered, what is grounded, what module is involved, and where the fault is most likely hiding.
For technicians and advanced DIYers, a power window wiring diagram is not just reference material. It is the shortest path to a repair decision. If you are testing a master switch, driver door module, motor, or splice point without the exact circuit layout, you are adding time to a job that should be straightforward.
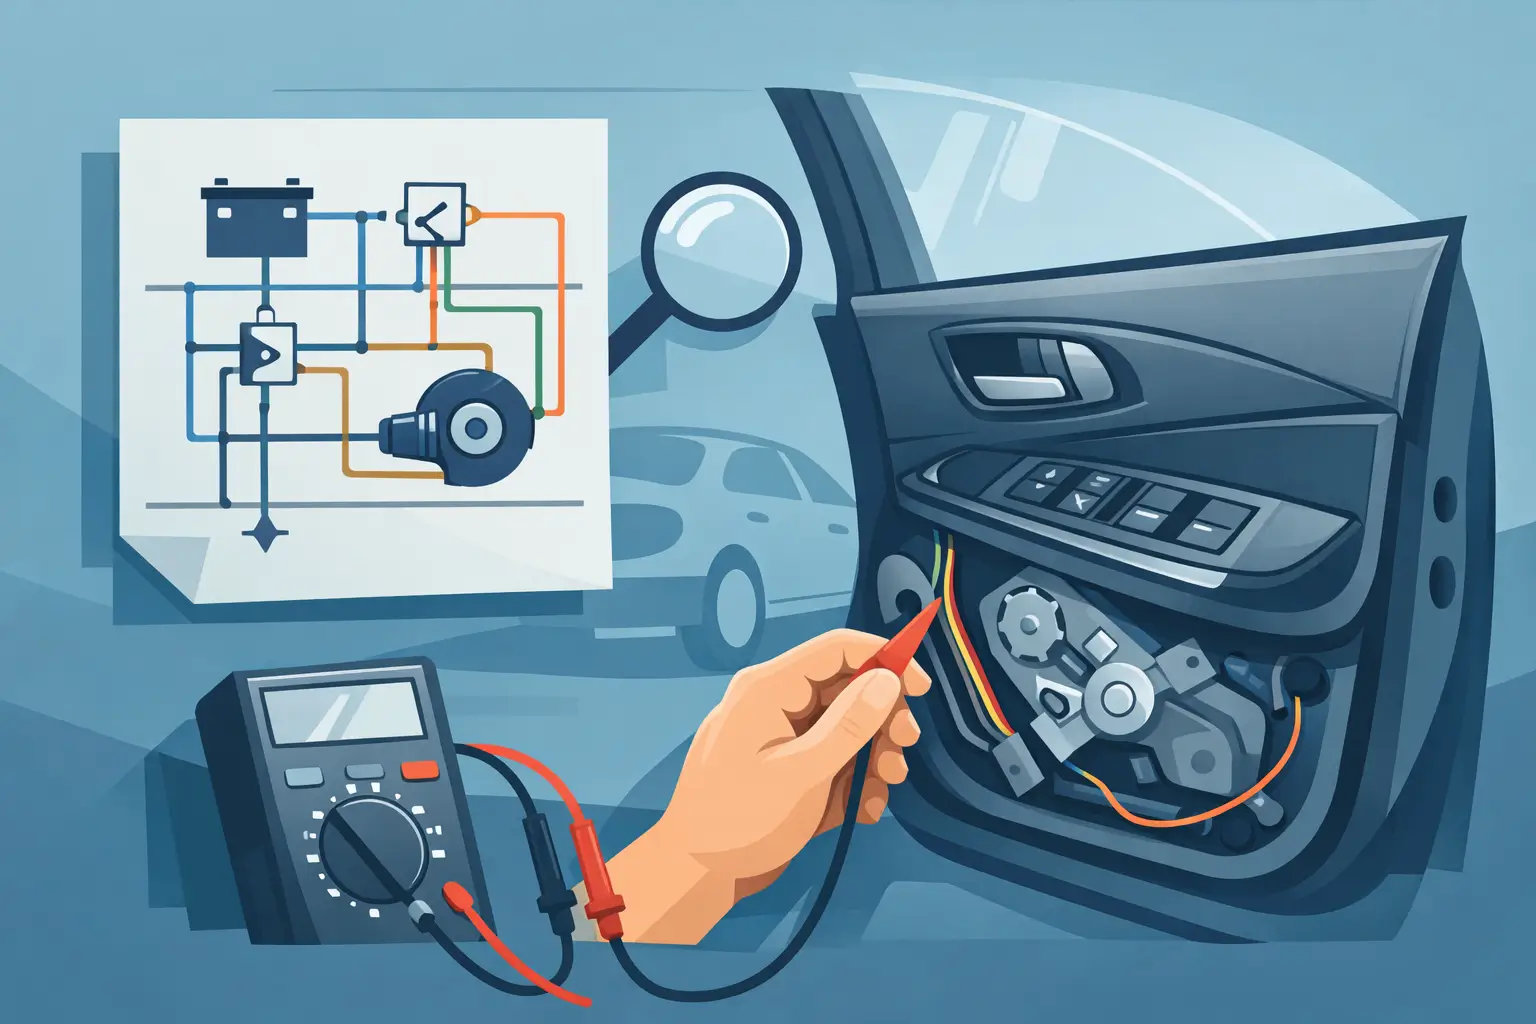
What a power window wiring diagram actually shows
At the basic level, a power window wiring diagram maps the electrical path between the battery feed, fuse or circuit breaker, switch assembly, control module if equipped, the window motor, and ground. On older systems, the circuit can be relatively simple. The switch reverses polarity to the motor, which changes the motor direction for up or down operation.
On newer vehicles, that same window system may route through a body control module, driver door module, passenger door module, retained accessory power circuit, or anti-pinch logic. In those cases, the switch may only be sending a low-current input signal while a module commands the motor through internal drivers or a separate control circuit.
That difference matters. If you assume every window circuit is just power, ground, and a motor, you can waste a lot of time condemning a switch that is only an input device. The diagram tells you whether you are working on a direct-control circuit or a module-controlled system.
How to read a power window wiring diagram without wasting time
Start with the power source. Find the fuse, circuit breaker, or fused B+ feed that supplies the window system. Then identify whether the windows operate with the key on, through retained accessory power, or at all times. If the vehicle uses retained accessory power, the windows may still function briefly after key-off until a door opens. That detail can affect your voltage checks.
Next, follow the circuit to the switch side. On many vehicles, the driver master switch is the main distribution point for the other windows. If the rear windows fail but the driver window still works, the problem may be inside the master switch, in a door harness, or in a communication or module feed depending on system design.
Then move to the motor circuit. A standard two-wire motor usually receives power on one wire and ground on the other for one direction, then the polarity reverses for the opposite direction. If you see both motor wires resting near ground or near battery voltage at rest, that can still be normal depending on how the manufacturer designed the circuit. The diagram keeps you from misreading a normal condition as a fault.
Finally, check grounds and connector locations. Window failures often trace back to broken door-jamb wires, corroded connectors, or weak grounds rather than failed motors. A clean diagram will show splice points, connector IDs, wire colors, and ground locations so you can test the circuit in the right place instead of tearing apart the wrong panel.
Common components shown in the circuit
Most power window diagrams include the same core items, but the control strategy changes by make and model. You will usually see a battery feed, fuse or circuit breaker, ignition or accessory source, switch assembly, motor, and one or more grounds. On many late-model vehicles, you will also see a body control module or door control module in the middle of the circuit.
Some systems include express-down or express-up functions. Others include anti-trap protection, position sensors, or LIN or CAN network communication between modules. When those features are present, the diagram becomes more than a simple motor circuit. It becomes a control map. That is why generic wiring references are often not enough for actual diagnosis.
Wire color is helpful, but it should never be your only identifier. Manufacturers reuse colors, especially inside door harnesses. Connector pin numbers, cavity locations, and component labels are what keep testing accurate.
The faults a wiring diagram helps you isolate fastest
A good diagram narrows down whether the problem is loss of power, loss of ground, an open motor circuit, a failed switch input, a broken communication path, or a module issue. That sounds obvious, but window complaints often overlap. A window that does not move can be caused by a seized regulator, a weak motor, a bad switch, an open wire, or a module that never received the command.
If the window works from the driver switch but not the passenger switch, the diagram tells you whether the passenger switch directly controls the motor or sends a request through the master switch or a module. If the window moves down but not up, the diagram helps separate a mechanical bind from a missing polarity reversal or failed internal switch contact.
If multiple windows stop working at once, look upstream. Shared fuse feeds, retained accessory power relays, module power supplies, or network faults become more likely than multiple failed motors. If only one door is affected, the harness between the door and body is a common failure point, especially on high-mileage vehicles.
Why vehicle-specific diagrams matter
This is the part that saves real labor time. A universal explanation of power window operation is useful for training, but repairs happen on specific vehicles. A Ford truck window circuit may be controlled very differently than a Toyota sedan, and both will differ from a BMW or Volvo with door modules and networked switching.
Even within the same manufacturer, trim level, body style, and production year can change the circuit. Auto-up, memory seat integration, child lock logic, and one-touch calibration all affect how the window system is wired and tested. Pulling the wrong diagram can send you after a relay that the vehicle does not have, or make you look for direct motor power on a system controlled by a smart module.
That is why exact downloadable repair documentation has practical value. If you need to identify the correct connector, wire color, splice, or module pinout for a specific vehicle, generic advice will only take you so far. With the right file, you can buy and download the circuit information, test the correct points, and start the repair now instead of spending another hour searching.
A practical test flow using the diagram
Use the diagram to build a short test path before touching the door panel. Verify the fuse or circuit breaker first. Then check whether the affected switch has the correct power and ground feeds. If the system uses a module, confirm the module power, ground, and wake-up conditions before you condemn the motor.
At the motor, test while commanding both directions. If the circuit should reverse polarity, you should see that happen on the two motor wires. If command is present and the motor does not move, the fault is likely mechanical or the motor itself. If command is missing, go back upstream to the switch or module output.
On intermittent faults, flex the door harness while monitoring voltage drop or continuity. Many window circuits fail only when the door moves. The diagram shows which wires are shared, which are dedicated, and where to backprobe safely.
When the problem is not electrical
A wiring diagram is still useful even when the root cause is mechanical. If power and ground are reaching the motor correctly and the motor stalls, slows, or draws excessive current, the regulator or glass channel may be binding. In that case, the circuit test keeps you from replacing electrical parts that are not at fault.
The reverse is also true. A motor can sound weak because voltage is low from a high-resistance connection. Without the diagram, that can look like a bad regulator or worn motor. With the diagram, you know exactly where to measure feed side and ground side voltage drop.
Getting the right information before you start
For electrical work, speed comes from accuracy, not shortcuts. The right power window wiring diagram gives you circuit routing, fuse protection, switch logic, connector views, and module involvement in one place. That matters whether you are diagnosing a single inoperative passenger window or a full-system fault tied to retained accessory power or body control operation.
If you need make-specific downloadable circuit information, AutoCarData provides direct access to repair documentation built for actual diagnostics across a wide range of brands. The value is simple – get the exact diagram, test the circuit correctly, and move the job forward.
A window circuit is usually a fast repair once you stop guessing and start following the right wire.